Verifying your WordPress or WooCommerce site, such as “My Shop” (from your “Blog Page” guide), in Google Search Console (GSC) using Google Analytics is a quick method for users with an existing Analytics tracking code. This ensures Google can index your pages, like products (e.g., “Flying Ninja” from your “Creating Products” guide) or blog content, for search visibility. This guide, based on the 6fc Live GSC Training video, explains how to verify site ownership using the Google Analytics tracking code, tailored for beginners and aligned with your previous guides (e.g., “Verify Domain,” “HTML File Verification”).
Why Use Google Analytics for Verification?
- Quick Setup: Leverages an existing Google Analytics tracking code, avoiding file uploads or DNS changes (unlike your “HTML File Verification” or “Verify Domain” guides).
- Immediate Verification: Works instantly if the tracking code is correctly placed.
- WooCommerce Fit: Supports indexing for product pages or membership content (from your “Membership Plans” guide) for verified users (from your “Email Verification” guide).
- Limitations: Requires Google Analytics setup with edit permissions; tracking code must be in the <head> section; only verifies the URL prefix (not subdomains unless specified).
Step 1: Ensure Google Analytics Setup
- Check Google Analytics Account:
- Log in to analytics.google.com with the same Google account used for GSC (per video).
- Confirm you have Edit permission:
- Go to Admin > Property Settings > User Management.
- Check your permissions or contact the account admin.
- Learn more at support.google.com/analytics/ (per video).
- Verify Tracking Code on Homepage:
- Ensure your site’s homepage (e.g., https://www.example.com) has the Google Analytics tracking code in the <head> section (per video).
- Steps:
- Open your homepage in a browser.
- Right-click > View Page Source (or Ctrl+U).
- Search for the Analytics code (e.g., UA-12345678-1 or G-XXXXXXXXXX for GA4) within <head>…</head>.
- Example: htmlCopy
<head> <script async src=\"https://www.googletagmanager.com/gtag/js?id=G-XXXXXXXXXX\"></script> <script> window.dataLayer = window.dataLayer || []; function gtag(){dataLayer.push(arguments);} gtag(\'js\', new Date()); gtag(\'config\', \'G-XXXXXXXXXX\'); </script> </head>
- Note: Codes in the <body> section work for Analytics but not for GSC verification (per video).
- Fix Tracking Code Placement (if needed):
- WordPress:
- Use a plugin like Insert Headers and Footers or Google Site Kit to add the code to <head>.
- Or, edit your theme’s header.php via Appearance > Theme File Editor (e.g., Neve theme, from your “Neve” guide).
- Manual:
- Access via cPanel (File Manager > public_html > header.php) or FTP (FileZilla).
- Paste the code before </head>.
- Google Tag Manager: Ensure the Analytics tag is set to fire in <head>.
- WordPress:
Step 2: Add Your Website to Google Search Console
- Access GSC:
- Go to search.google.com/search-console.
- Sign in with the same Google account used for Google Analytics (per video).
- Add Property:
- Click the property dropdown (top left) > Add Property.
- Choose URL Prefix (not Domain, per video) and enter your website URL (e.g., https://www.example.com).
- Use the exact protocol (http:// or https://) and subdomain (e.g., www or sub).
- Click Continue.
Step 3: Verify Using Google Analytics
- Select Analytics Method:
- In the verification popup, locate the Google Analytics option (per video).
- Click Verify if the tracking code is detected in your homepage’s <head>.
- Check Verification:
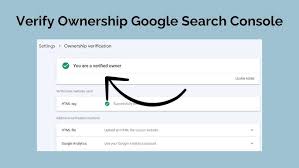
- If successful, GSC confirms “Verification successful” immediately (per video).
- If it fails, click Full Details for error messages (e.g., “Tracking code not found” or “Wrong account”).
- Access Property:
- Once verified, use GSC to monitor indexing, performance, and errors for your URL prefix (per video).
- Data Privacy:
- GSC uses the Analytics code only for verification; no Analytics data is accessed (per video).
Step 4: Troubleshoot and Verify
- Test Verification:
- In GSC, go to your property and check for a welcome message (e.g., “Improve your presence on example.com”).
- Confirm access to GSC tools (e.g., Performance, URL Inspection).
- Use URL Inspection to test your homepage (e.g., https://www.example.com/).
- Troubleshoot Issues:
- Verification Fails?:
- Confirm the Analytics code is in <head> (not <body>). Re-check page source.
- Ensure the same Google account is used for GSC and Analytics (per video).
- Verify Edit permission in Analytics (Admin > User Management).
- Clear server cache (e.g., Cloudflare) if the code isn’t updating.
- Code Not Found?:
- Re-add the code via Insert Headers and Footers or theme editor.
- Test in a private browser (e.g., https://www.example.com/ > View Source).
- Wrong Property?:
- Ensure the URL prefix matches the Analytics property (e.g., www.example.com vs. example.com).
- Alternative Methods:
- Use HTML file upload (from your “HTML File Verification” guide) or DNS TXT record (from your “Verify Domain” guide) if Analytics fails.
- Contact support at support.google.com/webmasters/ or support.google.com/analytics/.
- Verification Fails?:
- Maintain Verification:
- Keep the Analytics code in <head> to avoid losing verification.
Step 5: Enhance Your GSC and Analytics Setup
- GSC Features:
- Monitor performance with Performance Report (from your “Monitor Performance” guide).
- Submit sitemaps via Sitemaps (from your “Submit URL for Indexing” guide).
- Check Robots.txt Report for crawl settings (from your “Robots.txt” guide).
- Use URL Inspection for indexing issues.
- WooCommerce Integration:
- Verify product pages (e.g., https://www.example.com/product/flying-ninja/) for indexing.
- Pair with NotificationX for sales alerts (from your “NotificationX” guide).
- Secure transactions with Razorpay or UPI QR Code (from your “Razorpay” or “UPI Payment” guides).
- Use FiboSearch for indexed product searches (from your “FiboSearch” guide).
- Analytics Integration:
- Link GSC to Google Analytics for combined insights:
- In Analytics, go to Admin > Property Settings > Search Console Linking.
- Follow steps at support.google.com/analytics/answer/1308617 (per video).
- Track user behavior post-click (e.g., purchases, page views).
- Use Visualizer to chart Analytics data (from your “Visualizer” guide).
- Link GSC to Google Analytics for combined insights:
- Alternative Verification:
- If Analytics isn’t set up, use meta tag verification via Yoast SEO (from your “Neve” guide) or HTML file upload.
- Auto-verification may be available with some hosts (e.g., GoDaddy).
Step 6: Best Practices
- Account Consistency:
- Use the same Google account for GSC and Analytics to avoid verification issues (per video).
- Grant Edit permission to collaborators if needed.
- Code Placement:
- Always place the Analytics code in <head> for GSC compatibility.
- Test placement after theme or plugin updates.
- Testing:
- Verify tracking in Analytics (Real-Time > Overview) to confirm the code works.
- Check GSC’s Performance for post-verification data (from your “Monitor Performance” guide).
- Search site:example.com on Google to monitor indexed pages.
- Security and Compliance:
- Secure verified pages with Wordfence (from your “Malware Removal” guide).
- Use GDPR Cookie Consent for compliant tracking (from your “Cookie Notice” guide).
Pro Tips
- Boost Engagement: Promote verified pages via Welcome Bar or Join.chat (from your “Sticky Menu” or “Join.chat” guides).
- Ads: Run YouTube ads for verified content with Google Ads (from your “YouTube Ads” guide).
- SEO: Use Search & Filter for indexed content navigation (from your “Search & Filter” guide).
- Backup: Save site files with UpdraftPlus (from your “Backup and Migration” guide).
- Styling: Align verified pages with Neve’s design (from your “Neve” guide).
Congratulations!
You’ve verified your website in Google Search Console using Google Analytics with 6fc Live! Your WordPress or WooCommerce site is now ready for indexing and performance tracking. For more GSC tips, check the Google Webmasters YouTube channel (youtube.com/@GoogleWebmasters) or visit search.google.com/search-console. Combine with your other guides (e.g., “Monitor Performance,” “Robots.txt,” “Search & Filter”) for a robust SEO strategy. Need help with Analytics setup, verification, or troubleshooting? Comment below or visit support.google.com/webmasters/ or support.google.com/analytics/!